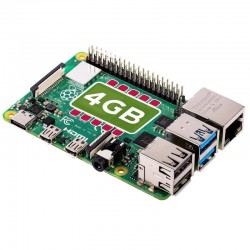
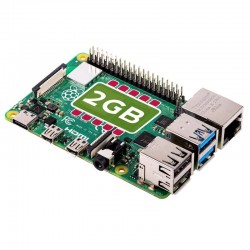
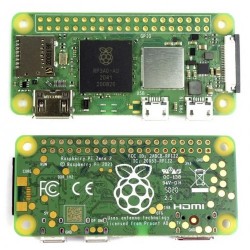
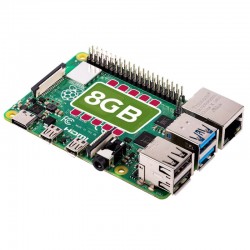
The Raspberry Pi, a popular single-board computer, is an excellent platform for hardware tinkering and experimentation. In this tutorial, we'll walk you through the process of developing a sample character device driver that exports the ADS1115 Analog-to-Digital Converter (ADC) as a character device named "ADCS." Additionally, we'll delve into the intricacies of setting up I2C communication to read data from the ADC. By the end of this tutorial, you'll have a solid understanding of writing Linux kernel modules, interfacing with hardware devices over I2C, and creating a character device driver.
Prerequisites
Before you begin, make sure you have the following prerequisites in place:
1. Raspberry Pi Setup: Ensure you have a functioning Raspberry Pi board with Raspbian or Raspberry Pi OS installed.
2. ADS1115 ADC: Acquire the ADS1115 ADC module. You can easily find this module online or at electronics stores.
3. Basic Linux Knowledge: Familiarity with Linux commands and navigating the terminal.
4. C Programming: Basic knowledge of the C programming language.
Step 1: Enabling I2C Interface
Since the ADS1115 communicates via the I2C protocol, you need to enable the I2C interface on your Raspberry Pi:
- Open the terminal and run:
sudo raspi-config
2. Navigate to Interfacing Options > I2C and enable it.
3. Reboot your Raspberry Pi:
sudo reboot
Step 2: Writing the Character Device Driver
Let's dive into the steps required to write the character device driver:
1. Creating the Driver Directory:
Open a terminal and create a directory for your driver source code:
   mkdir adc_driver
   cd adc_driver
2. Writing the Driver Code:
Create a new C file named `adcs_driver.c` and open it using your preferred text editor:
nano adcs_driver.c
Here's a simplified outline of the driver code with placeholders for various sections:
   // Include necessary headers
   #include <linux/module.h>
   #include <linux/fs.h>
   #include <linux/cdev.h>
   #include <linux/device.h>
   #include <linux/i2c.h>
   #include <linux/uaccess.h>
   // I2C communication functions
   static int adcs_read_data(struct i2c_client *client);
   // Character device driver functions
   static int adcs_open(struct inode *inode, struct file *file);
   static int adcs_release(struct inode *inode, struct file *file);
   static ssize_t adcs_read(struct file *file, char __user *buf, size_t len, loff_t *offset);
   // Other necessary definitions and declarations...
   // File operations structure
   static struct file_operations adcs_fops = {
       .owner = THIS_MODULE,
       .open = adcs_open,
       .release = adcs_release,
       .read = adcs_read,
       // Add more operations if needed...
   };
   // Driver initialization
   static int __init adcs_driver_init(void) {
       // Initialize and register the character device...
       // Initialize I2C communication...
       return 0;
   }
   // Driver cleanup
   static void __exit adcs_driver_exit(void) {
       // Unregister and release resources...
       // Cleanup I2C communication...
   }
   // Module information
   MODULE_LICENSE("GPL");
   MODULE_AUTHOR("Your Name");
   MODULE_DESCRIPTION("Sample ADCS Character Device Driver");
   // Module initialization and cleanup functions
   module_init(adcs_driver_init);
   module_exit(adcs_driver_exit);
   `
Note: The complete driver code involves more details, including the I2C communication with the ADS1115. This outline provides the basic structure.
3. Implementing Driver Functions:
Fill in the details for the driver functions like `adcs_open`, `adcs_release`, and `adcs_read`. Additionally, implement the `adcs_read_data` function for I2C communication to read data from the ADC.
4. Creating a Makefile:
Create a Makefile in the same directory as your driver code:
nano Makefile
Add the following content:
   obj-m += adcs_driver.o
   all:
       make -C /lib/modules/$(shell uname -r)/build M=$(PWD) modules
   clean:
       make -C /lib/modules/$(shell uname -r)/build M=$(PWD) clean
Save the Makefile and compile the driver:
make
5. Loading the Driver:
Load the driver module:
sudo insmod adcs_driver.ko
6. Testing the Driver:
Check if the character device is created:
ls -l /dev/adcs
Now, you can write a user-space program to interact with the ADC character device `/dev/adcs`.
Step 3: I2C Communication for ADC Readings
Implementing I2C communication with the ADS1115 ADC requires configuring the I2C bus and sending commands to read data. Here's a simplified version of the `adcs_read_data` function:
static int adcs_read_data(struct i2c_client *client) {
    // Send command to ADC for reading data...

    // Read data from ADC...

    return data; // Return the read data
}
In this function, you'll use I2C functions provided by the Linux kernel to communicate with the ADC. Remember that the complete implementation requires setting up the I2C bus and addressing the ADS1115 properly.
Conclusion
Congratulations! You've embarked on a journey to develop a character device driver that exports the ADS1115 ADC as a character device named "ADCS" on your Raspberry Pi. By combining your knowledge of Linux kernel modules, character device drivers, and I2C communication, you're well-equipped to delve deeper into the world of hardware interfacing and kernel development.
Always remember to exercise caution when working with kernel modules and hardware interfaces. Testing on a separate system before deploying on your main system is a smart practice. Happy coding and exploring the endless possibilities of the Raspberry Pi ecosystem!


